Easy Homemade Chicken Meatballs From Scratch

I sometimes use some kind of processed meat in my recipes. They are a great source of flavour and are very convenient to cook, especially in soups. However, I was asked if beef can be substituted with chicken meat in this Beef Meatballs Recipe recently. The answer is: Yes! So I would like to share how I make my Homemade Chicken Meatballs from scratch.
Please note that these Homemade Chicken Meatballs are still raw, even after cooking in a low simmer to strengthen their shape. They should be used in another recipe to properly cook them, or steamed/ boiled/ grilled until well-cooked before consumption.
Homemade Chicken Meatballs Recipe
Ingredients
As it is homemade, I’ve used tapioca flour to bind the chicken meat. The other seasonings that contribute to the taste include salt, sugar, pepper, garlic powder and light soy sauce. Baking powder is also added to introduce air bubbles in the meat, which helps give that squishy, springy texture to the final product.

As for the best cut to use; any chicken part will be good. I personally opted for lean meat (ie. chicken breast without skin) to reduce the fat contents in these delightful meatballs. This gives a more subtle flavour for a healthier and hassle-free version. If preferred, the more fatty parts, like chicken thighs, drumsticks and wings can be used as well – it will definitely make these chicken meatballs tastier, albeit slightly more effort to debone!
Preparing the Chicken Meat
Firstly, mix the tapioca flour with the rest of the dry seasonings: salt, sugar, pepper, baking powder and garlic powder. Set it aside while we work on the chicken.

As my chicken breast comes with the skin, I’ve removed it, trimming any fats along the way. Then, cut the chicken breast meat into smaller cubes so that it’s easier to process it.
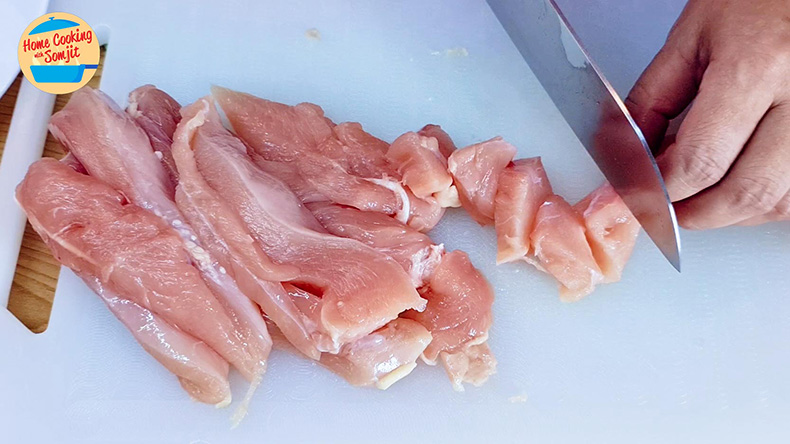
Once done, process the chicken meat in a food processor until smooth and fluffy. As there are too many chicken cubes, I’ve divided them equally into 2 batches. I have also divided the flour mix and light soy sauce into 2 batches respectively.
I don’t recommend using a blender for this as it requires water to finely blend the chicken meat. Adding water to the chicken meat as it blends makes it wet and diluted, which is not the texture we are looking for.
Put the first batch of chicken cubes into the food processor, along with 2 to 3 ice cubes. The ice cubes are important to keep the meat cool as it is processed. This is because the mincer tends to heat up, and the heat can sometimes accidentally pre-maturely cook parts of the chicken meat. We want to avoid this as it makes the chicken meat form lumps and become unevenly minced. Process the chicken meat for about 25 seconds, or until smooth.
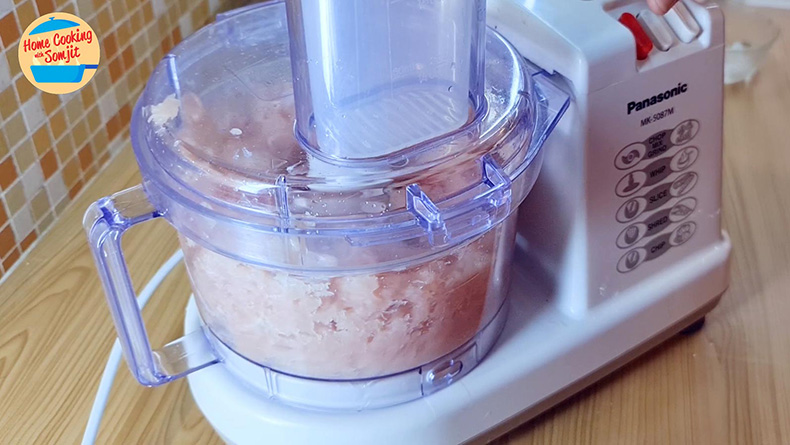
Once the chicken meat is smooth, add in the first batch of mixed flour and 1 teaspoon of light soy sauce. Process them again for 20 seconds to mix and season the chicken well. After 20 seconds, I noticed that the food processor is heating up the chicken meat again – so I’ve added another 3 ice cubes to bring down the temperature. Continue processing for another 20 seconds, or until the chicken meat is very smooth and fluffy.

Once done, transfer all the processed chicken meat into a (freezer-friendly) mixing bowl. Repeat the process with the second batch as well.
Seal the mixing bowl with cling wrap and place it in the fridge for 4 hours, or freezer for 2 hours. This is to chill the chicken meat thoroughly so that it keeps fresh as we work on shaping and cooking later.
Cooking Chicken Meatballs
15 minutes before the chicken meat is taken out, prepare the stove area to make shaping and cooking the chicken meatballs easier.
Fill a deep pan with water and bring it to a low simmer. Once it has reached a low simmer, maintain the temperature and ensure that it does not go into a rolling boil. This is important as it gives us 2 benefits: the meatballs maintain their shape as they are cooking, and their flavours are also retained.
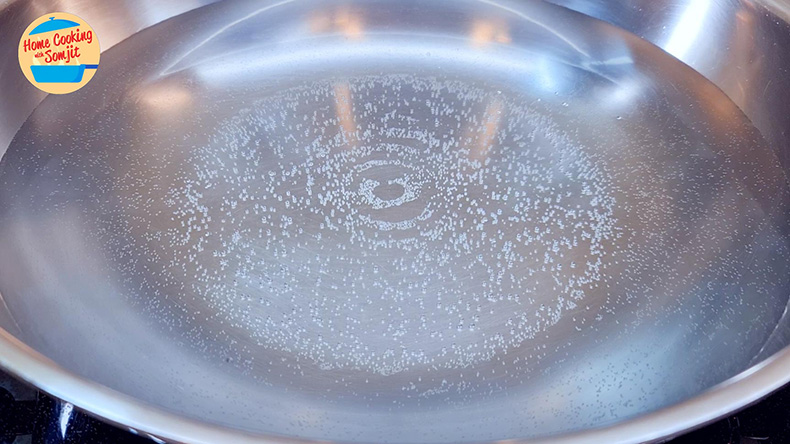
Then, fill a basin with cold water. We will use it to shock the chicken meatballs after they are cooked. This helps keep the chicken meatballs’ exterior springy and squishy as well. Lastly, fill a small bowl with warm water too. This bowl will be used to clean the spoon as we shape the meatballs.
After chicken meat is sufficiently cold, remove them from the chiller. Remove the cling wrap and set it near the pan of simmering water. Give it a nice stir to thoroughly mix the chicken meat.
With a clean hand, grab a handful of the chicken meat. Gently squeeze it, shaping the surface with the index finger and thumb. When you’re happy with the size and shape, use a large spoon from the other hand to cut off the shaped chicken meatball and add it to the pan. Return the spoon to the warm water in the small bowl occasionally to wash the excess remnants of chicken meat.

Repeat this process until all the processed chicken meat is finished. They will sink to the bottom of the pan and slowly float to the surface once they are fully cooked. They can be left floating until no more processed chicken meat is left.

Once shaping the chicken meat is done, remove all the floating chicken meatballs with a large strainer. Transfer them into the basin with cold water to shock them. Allow them to rest in the water for 5 – 8 minutes.
Then, strain all the chicken meatballs. Let them rest in the strainer to drip off the excess water, as they cool down to room temperature. While waiting, they can be inspected for small bumps or stumps; and trimmed according to personal preference. I did not trim any as I like them to look not perfect. 🙂

Please note that I do not recommend consuming them as-is as the low simmer cooking process only helps to strengthen their exterior shape. They are still raw in the sense that the bacteria are probably present – and they need to be cooked again in another recipe, or boiled in vigorously boiling water.
Storage Instructions
If not using them immediately, store them in air-tight containers in the fridge. They can last up to 3 days in this manner. I do not recommend freezing them as the formation of ice crystals affects their texture, losing their springiness and squishiness as they thaw.
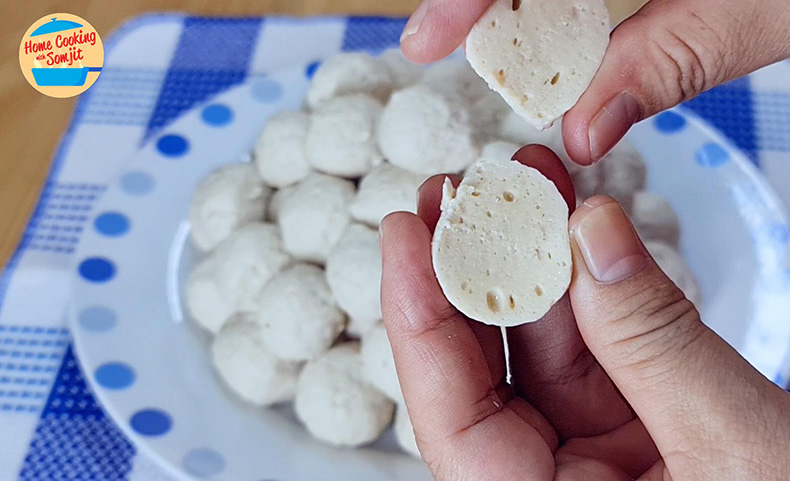
These chicken meatballs are soft, squishy, and springs back when pressed while still raw.
After making these, I’ve grilled and steamed the chicken meatballs, serving with a chilli dipping sauce. They make a perfect side dish and a healthy snack. When they are fully cooked, they are tender, softer, subtly flavoured and almost melts in the mouth, unlike the chewy and firm commercially made ones.
I would recommend using them in stir-fries, soups or steaming/ boiling them as-is too.
Enjoy 🙂
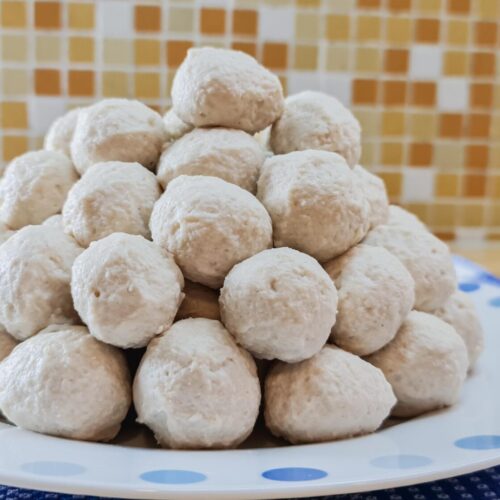
Homemade Chicken Meatballs Recipe
Equipment
- Food Processor
- Wok
- Stainless basin
- Hand Whisk
- Cling Wrap
- Large strainer
Ingredients
- 950 g chicken breast meat, washed, cleaned and chilled
- 6 tbsp tapioca flour
- 1 tsp baking powder
- 1 tsp salt
- ½ tbsp sugar
- 1 tbsp garlic powder
- ½ tsp pepper
- 2 tbsp light soy sauce
- ice cubes, to process with the chicken meat
Instructions
Prepare the Seasonings
- In a large mixing bowl, with a whisk, mix together tapioca flour, baking powder, salt, sugar, pepper and garlic powder. Set aside.
- Remove the chicken bones. Trim the chicken skin as well (optional). Cut the chicken breast meat into smaller cubes for processing.
- Divide the chicken into 2 equal batches.
Processing Chicken Meat
- In a food processor, blend together one batch of chicken meat and 3 ice cubes for 25 seconds, or until smooth.
- Add in 1 tbsp of light soy sauce and half of the mixed flour.
- Cover the food processor and continue to blend the mixture for another 20 seconds.
- Add in 3 ice blocks, and continue to blend for 20 more seconds, or until fluffy and smooth.
- Transfer the chicken meat to a large mixing bowl. Repeat the steps for the second batch of cubed chicken meat.
- Seal the processed chicken meat with cling wrap and chill in the fridge for 4 hours, or 2 hours in the freezer.
Pre-Cooking Chicken Meatballs
- Prepare a pan of simmering water, a basin of cold ice water, and a bowl of warm water. Maintain the temperature of the simmering water. Ensure it does not go into a rolling boil.
- Take out and stir the chilled chicken meat.
- Make round balls from the processed chicken meat. Shape and squeeze a handful of chicken meat through the index finger and thumb. Scoop the chicken meatball with a spoon and gently drop it into the simmering water. Return the spoon into the bowl of warm water.
- Repeat the previous step until all the processed chicken meat is finished.
- With a strainer, carefully remove the chicken meatball that are floating. Transfer them to the basin of cold water. Allow the chicken meatball to soak for 5 – 8 minutes.
- Strain the chicken meatballs. Allow them to rest in the strainer until cooled to room temperature.
- The chicken meatballs are ready to be used, or stored for up to 3 days.
Video
Notes
Important:
- The chicken meatballs are not safe to consume as-is. The simmering water cooks the meatball enough to hold its shape, but not enough to kill the bacteria in raw chicken. They need to be cooked in another recipe or boiled/ steamed until well-cooked before serving.
- A food processor is highly recommended. A blender is not recommended as it needs water to finely blend the chicken meat. This may result in wet and diluted chicken meat, as opposed to fluffy and smooth processed chicken.
- Simmering water is used for 2 reasons:
- the gentle boil maintains the chicken meatballs’ shape
- slowly cooking the chicken meat locks in most of its flavour so it’s not lost in the water.
Storage Instructions:
- Can be used in any recipe immediately.
- Can be stored in air-tight containers once cooled in the fridge for up to 3 days.
- Freezing is not recommended as ice crystals will alter the texture as they are thawing.